T3 Create your first Blueprint Mod
Requirements
- Unreal Engine 4.25.4
- recursively cloned version of our ArgonSDK#Repository
YT Example
An example demonstrating the creation of a simple mod which executes a console command
Parts related to mod loading at the end of the video are outdated!
Working directory
You may create mods and maps anywhere in the Content\Mods directory.
Info
Historically, the default directory for Mod Actors is Content\Mods\AgMods\<ModName>\<ModName>.uasset.
If you stick to this naming scheme, you don’t have to specify any asset when adding a Mod Marker (#2. Create a Mod Marker).
Pak batch script provided in this tutorial also targets this base directory by default Content\Mods\AgMods
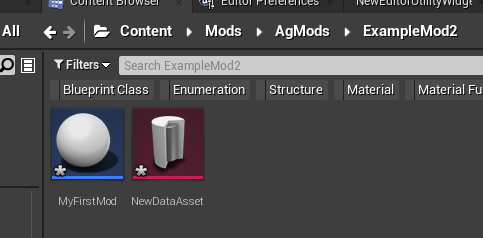
1. Create a Mod Actor
- In the
Content Browserwindow, create and enter a new directory, then right click and create a new Blueprint asset - Select
ArgonSDKModBaseas base class when prompted.
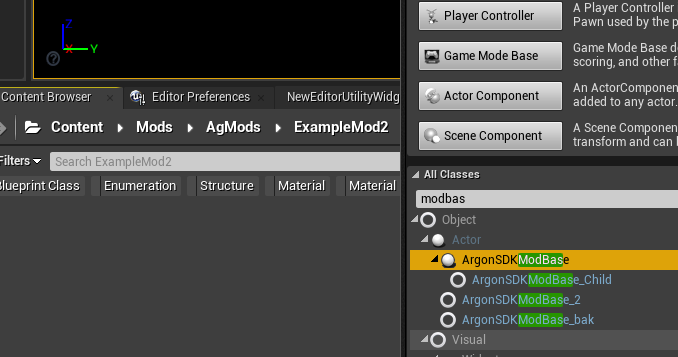
- Name it as desired. Don’t use spaces
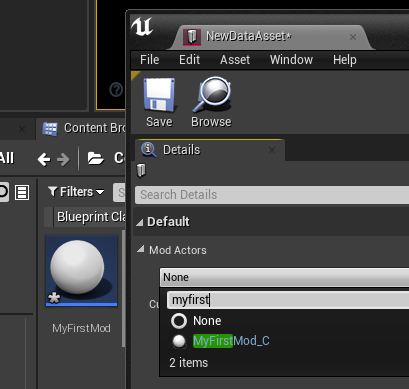
2. Create a Mod Marker
A Mod Marker is required for the mod loader to detect your newly created actor. You can use a single Mod Marker to tag multiple actors.
- Right-Click and create a new Data Asset (
Miscellaneous -> Data Asset) of classDA_ModMarker - You can leave the default filename or pick something else (e.g.
ModMarker)
- Open the Data Asset and add your ModBase actor to
Mod Actors[!Info]
You can omit this step if you’re using this base directory and naming schemeContent\Mods\AgMods\<ModName>\<ModName> - the
valuefield is currently unused, in the future it may be displayed as part of the tooltip in main menu
3. Mod Settings
Open the Mod Actor asset (MyFirstMod). A new window should open with a list of properties
When inside the Blueprint editor, click on Class Defaults to view and edit these settings.
General Settings
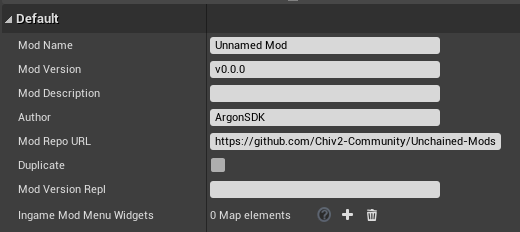
Ignore Duplicate and Mod Version Repl fields.
Ingame Mod Menu Widgets specifies a map of widgets to be displayed as tabs during a match. See #In-Match UI
Mod Loader Settings
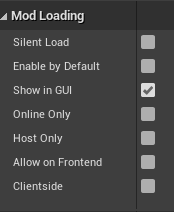
| Flag | Description |
|---|---|
| Silent Load | Don’t show Loaded *** Version.. message during a match |
| Online Only | Only Unchained |
| Host Only | Only offline play or on an Unchained Server |
| Allow on Frontend | Load only on the Frontend map (main menu). Mod is instantly enabled when toggled |
| Clientside | Mod will load on the client only (Unchained and TB MP) |
4. Hello World
Let’s print something
1. Open the Mod Actor (MyFirstMod)
2. Click on Open Full Blueprint Editor if only the class defaults are visible
3. Right-Click and add a Show Local Chat node (wrapper for ClientReceiveLocalizedChat)
4. Connect it to the Parent:BeginPlay node
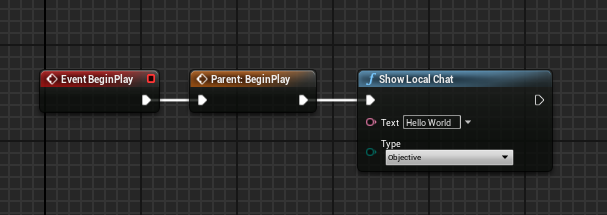
Now as soon as the mod actor is loaded (spawned), our message will be displayed in the chat
5. Cooking and PAKing
See Introduction#Loose vs Packaged assets for general description.
Option A1: Cook and Package in UE4 Editor
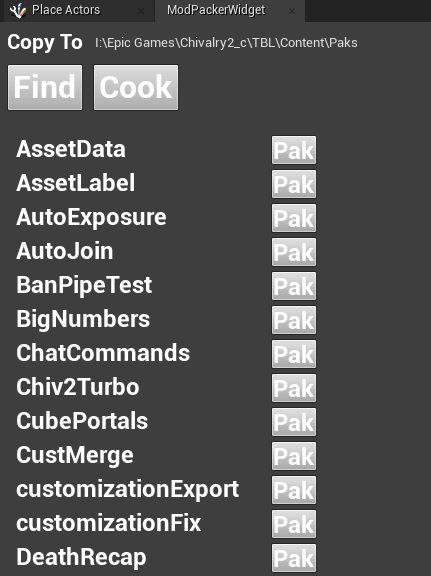
1. Locate ModPackerWidget in Content/Scripts directory and run it (Right Click -> Run)
2. Change the output directory
- You can set it to the Chiv2 Paks directory. A running client will block pak replacement
3. Click on Find to locate mod markers, Cook if necessary
Note
Options A1 and A2 support content replacement.
Any assets placed in _Content subdirectory inside a mod’s folder will be saved as TBL/Game/...
Option A2: Cook and Package with Python script
The Widget Blueprint in #Option A1 Cook and Package in UE4 Editor is a wrapper for the build.py script located in ArgonSDK/Scripts.
The script can be called manually for a more streamlined packaging process.
Supported functions are: cook, pak
Default values
Open the script in a text editor and set following paths valid for your setup.
This step is optional but it will let you omit some parameters when calling the script
PROJ_PATH_DEFAULT = 'M:/chivmodding_i/SDK/ArgonSDK/TBL.uproject'

UE4_PATH_DEFAULT = 'H:/epic/UE_4.25/Engine/'

OUTPUT_DIR_DEFAULT = 'M:/chivmodding_i/SDK/ArgonSDK/Scripts'
Cooking
usage: build.py cook [-h] [uproject_path] [ue4_root]

positional arguments:
  uproject_path  path to .uproject file
  ue4_root       path to ue4 ("H:/epic/UE_4.25/Engine/")
Paking
usage: build.py pak [-h] mod_name [mod_dir] [dest_dir] [uproject_path] [ue4_root]

positional arguments:
  mod_name       Name of the mod (resulting pak) (or comma separated list)
  mod_dir        mod directory, base directory (ends with /) or comma-separated list. defaults to "/Game/Mods/AgMods/<mod_name>"
  dest_dir       Output directory. Will be created on spawn
  uproject_path  path to .uproject file
  ue4_root       path to ue4 ("H:/epic/UE_4.25/Engine/")
Single mod: python build.py pak DripSync will create DripSync.pak from source in /Game/Mods/AgMods
Multiple mods (these commands yield same results):
$ python build.py pak DripSync,ModMenu /Game/Mods/AgMods/DripSync,/Game/Mods/AgMods/ModMenu
$ python build.py pak DripSync,ModMenu /Game/Mods/AgMods/
$ python build.py pak DripSync,ModMenu

Mod "DripSync": "/Game/Mods/AgMods/DripSync"
27 files added to "M:/chivmodding_i/SDK/ArgonSDK/Scripts\DripSync.pak"
Mod "ModMenu": "/Game/Mods/AgMods/ModMenu"
36 files added to "M:/chivmodding_i/SDK/ArgonSDK/Scripts\ModMenu.pak"
Option B: Cook and Package with a Batch script
Warning
This method is suitable if:
- Your mods are located in Content\Mods\AgMods\<ModName> directory (naming not important)
- Your mod has no asset replacements (e.g. Heraldry replacement)
- Locate build.bat in
ArgonSDK\Scripts\build.bat - Edit your local file and set
CHIVALRY_PATHandUE4_PATHvariables`_
set "CHIVALRY_PATH=I:\Epic Games\Chivalry2_c\TBL\Content\Paks"
 set "UE4_PATH=I:\Epic Games\UE_4.25\Engine\Binaries\Win64"
Optionally create a shortcut and set CHIV2_LAUNCH_LNK variable to launch the game with -l parameter
set "CHIV2_LAUNCH_LNK=I:\Epic Games\Chivalry 2 - EGS.url"
3. Run the script using following syntax:
build.bat <ModName> -c -l
-c : also cook the project
-l : launch game after paking
e.g. build.bat DeathRecap -c followed by build.bat ModMenu -l to cook both and launch afterwards
[!Info]
The script will create a new output directory underArgonSDK\Scripts\Paks.<ModName>.pakand<ModName.txt>are produced
It also copies the output .pak file to your Chivalry 2’sPaksdirectory.
Option C: Cook and package manually
- Save your assets and click on
File -> Cook Content for Windowsto start the cooking process.
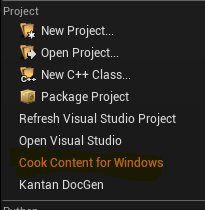
- It may take a while to cook the entire project when cooking for the first time.
- A large number of errors not related to your mod actor may appear in the logs. These are expected as we’re dealing with a bunch of dummy assets. It should not influence your mod actor.
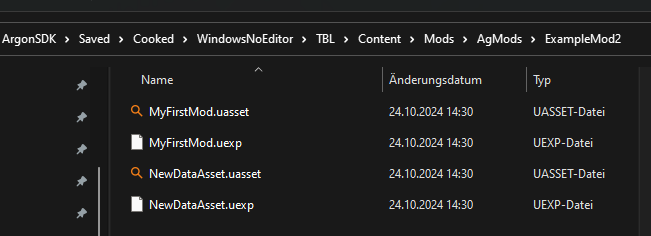
- Resulting (Cooked) assets are written to
ArgonSDK\Saved\Cooked\WindowsNoEditor\TBL\Content
- Refer to ArgonSDK Wiki and use
UnrealPak-With-Compression.bat
ArgonSDK Wiki:Step 2: paking
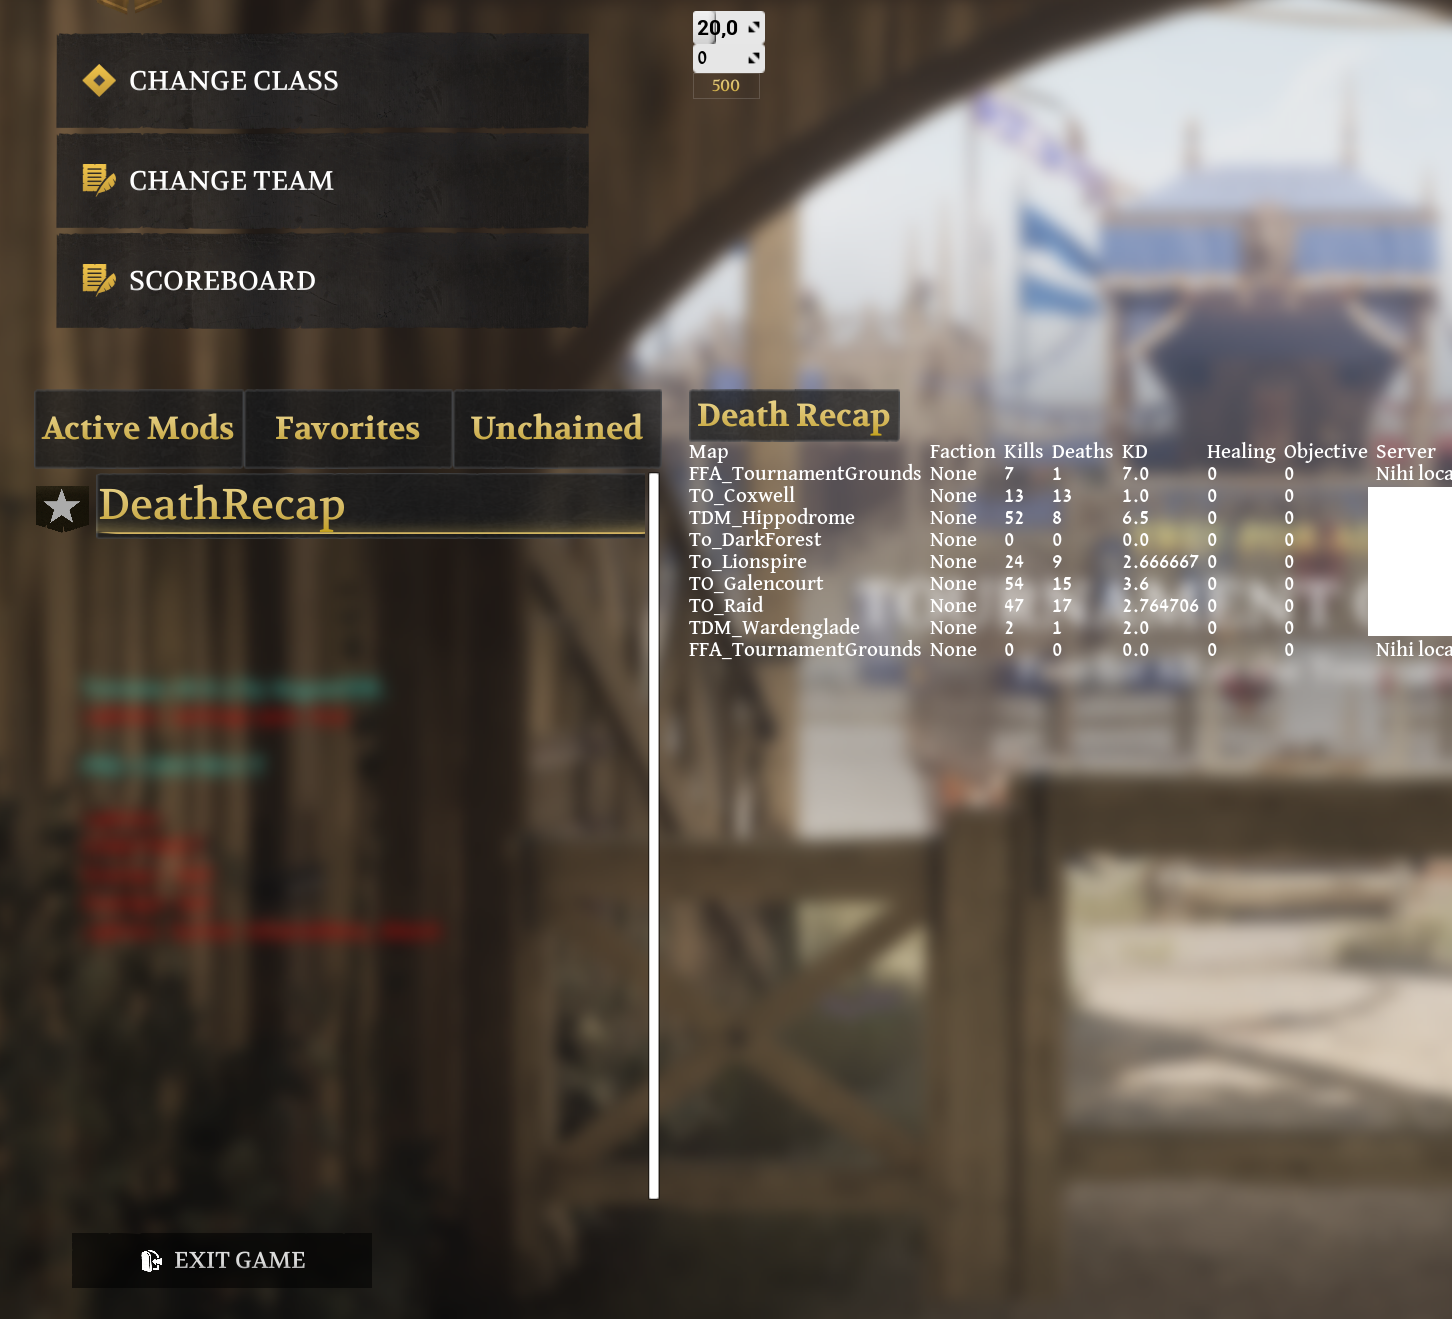
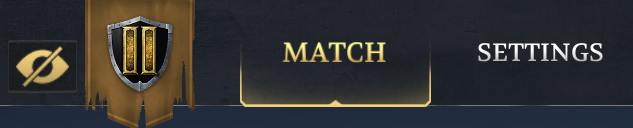
6. In-Match UI (Optional)
You can register multiple widgets that will load together with your mod. These will be displayed in the Pause menu.
The button in upper left corner toggles menu visibility.
To add a new tab widget, create a Widget Blueprint of class IngameModMenuBaseWidget and add it together with desired name to the field in #General Settings